
We have a customer who needs to take images and store them for future use in reports, save them to a network drive, and show them in PowerApps. In the current preview this could be a challenge, but it won’t be if you keep reading.
SCENARIO
PowerApps User Experience for the Insurance Agent
An insurance company needs a claims adjuster — using PowerApps — to take a photo on their phone of fire damage at an apartment complex. Those pictures will later be used in a Reporting Services report and sent to the customer.
STEP ONE
Generate an App
Generate an app from any data sources that are available. That could be SharePoint (Online or On-Premise), SQL Server, Excel, or any other platform. For this example, start with a blank app and use the Excel sample here: BlogImageSampleExcel

In PowerApps, generate an app from any available data source. For this example, we used Excel.
The user will select which incident they want to work on. Add a Gallery and set how the data should look:

The PowerApps user will select which incident they want to work on.
Add a Camera icon so the adjuster can take photos for each Incident.
STEP TWO
Add Camera Screens
The next step will be to create a few new screens in order to take a photo, confirm the photo, and show a gallery of photos taken.
You’ll need to create three different screens:
- A camera screen called Camera
- A confirmation page called Captured_Images
- A photo gallery called Gallery

Create three different camera screens in your new app.
The Camera Screen
On the Camera screen, insert a camera capture field type and create a text input box so the photo will have a name.

The first step in setting up a PowerApps camera screen.
By clicking on the Camera, we can set the OnSelect properties and add this code:
"Navigate(Captured_Images, ScreenTransition.None); Collect(Captured,{TakenPic: Camera1.Photo,PicName: PicName,LastPage: ""})"
Let’s break down what is happening with this statement.
First, we should navigate to the next page so the adjuster has a fast experience. Next, we are collecting the photo and the name, and putting that into a local collection called Captured. In that collection, create two columns. The first column saves the picture, and the second will put the name entered into the collection.
Now we can move on to the Confirm Camera screen. On this screen we’ll add a Gallery, and hook it up to the collection we just created called Captured. Then we’ll need to add two buttons: one called Retake Photo, and one called Save Photo.
The Confirm Images Screen

Add two buttons to your Confirm Images camera screen.
The Retake Photo button will clear our collection and move us back to the Camera page to try again. The Save Photo button will store the picture into Azure Blob storage, get a URL back from that storage, then save the URL and photo name into our PicturesTaken Excel spreadsheet for future use.
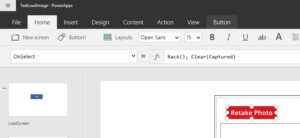 Add a formula into the OnSelect for the Retake Photo button.
Add this formula into the OnSelect for the Retake Photo button: “Back(); Clear(Captured) “
The Save Photo function will start like this:
" Navigate(TestPictures,Fade); Patch(PicturesTaken,Defaults(PicturesTaken),{ Photo_URL:ImageUploadAPI.UploadImage(ThisItem.TakenPic, {fileName: ThisItem.PicName }).FileURL, Image_Name:ThisItem.PicName}) ;RemoveIf(MyPix,Image_Name=ThisItem.PicName); Collect(MyPix,{ Photo_Size:"https:// blogstoragename.blob.core.windows.net/images/" & ThisItem.PicName & ".jpg", Image_Name:ThisItem.PicName, ActualPhoto:ThisItem.TakenPic }); Clear(Captured) "
Let’s break down this formula before it gets more complicated.
First, the command will go back to the first screen with the incident records, then the record will be created in the PicturesTaken tab of the Excel sheet connected to PowerApps. The command will check to see if this photo is already in the collection — if it is, it will be deleted. The record will have a hard coded URL to an Azure blob storage URL, and the name from the collection will be passed in. Then, since we’re done with it, we will clear the temporary collection. The ImageUpload API will be covered later on.
The Photo Gallery Screen
Another gallery will need to be added. This one will show all of the photos taken or saved, currently or in the past.

Add an image property formula to track photos taken during each PowerApps session.
On the photo in the gallery, add this to the image property:
If(IsBlank(ActualPhoto)= true,ThisItem.Photo_URL,ActualPhoto)
This will check whether the adjuster just took a photo during this PowerApps session. If so, it will use that photo rather than the one from the Azure Blob storage.
The gallery items should come from the MyPix collection, which is where all of the current and saved photos are loaded.
The Load Screen
Place this function on the start button or anywhere before you enter in the app: ( Collect(MyPix,PicturesTaken);Navigate(TestPictures,Fade) )
It will load everything from the PicturesTaken Excel tab into the collection as a table.
Lastly, we will add a button or icon to the Screen1 that will take us to the Gallery Screen.
STEP THREE
Set up the Image Upload API
For detailed instructions on how to upload images from the camera control to Azure blob storage, check out this post from the PowerApps Community blog.
You can upload any file and name it, and then that file will transfer to your Azure Blob Container. Add that Custom API to your PowerApps app, and you can save all of your pictures to the cloud.
[divider line_type=”Small Line” custom_height=”20″]