
In an earlier blog post we shared how to use the out of the box Camera in PowerApps to capture photos and upload them to Blob Storage.
You can now launch the native camera from iOS or Android players, which means your users can enjoy all of the functionality of the full camera product built into the device — things like flash, zoom, etc.
In order to use the native camera, you’ll need to use a different component: the Add Picture Media item. The Add Picture component (Insert >> Media >> Add Picture) allows a user to select where they want the picture to come from.
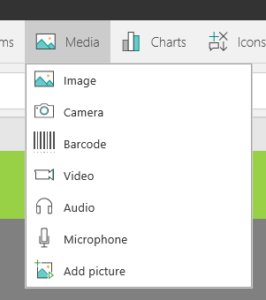
iOS users will have the option to launch the native camera storage on the device, or from the Apple Cloud. For Android, users will have an option of local device or native camera. If you use this on the web or Windows app, you can upload a photo from your desktop.
When you use this component, three items will be added in the Studio:
- AddMediaButton1
- UploadImage1
- AddMediaWithImage1
Add Media Button 1
This is an invisible button that shows the user a message to Tap or Click to Change the Image. It kicks off the process to prompt the user to select what option they want to do.
UploadImage1
The image that is selected or taken with the native camera is shown back to the user here. Then you can take the picture and follow the image capture blog to send it to blob storage.
AddMediaWithImage1
This is a wrapper component, and you don’t need to do anything with it.
At Confluent, we have moved many of our client’s apps over to this native experience so the user has more options. For an offline experience, users can take their pictures and upload them later when they have connectivity again. Having access to the flash is especially important to some customers with darker work spaces.
[divider line_type=”Small Line” custom_height=”20″]